KYC (Know Your Customer) update is one of the most overlooked but essential steps to ensure seamless Provident Fund (PF) withdrawals, transfers, and claim settlements. An outdated or incorrect KYC can lead to claim rejections, delays, or even complete inaccessibility of your PF account.
In this guide, we explain why KYC is important, how to update it through the UAN portal, and what to do if your employer is unresponsive.
🔍 Why KYC Update is Important for EPF
✅ Ensures smooth PF withdrawal and transfer
✅ Reduces chances of claim rejection
✅ Prevents mismatch issues between Aadhaar, PAN, and bank records
✅ Mandatory for online claim submission
📑 Documents Required for EPF KYC Update
Here are the key documents you’ll need:

Step-by-Step: How to Update KYC on the EPFO Member Portal
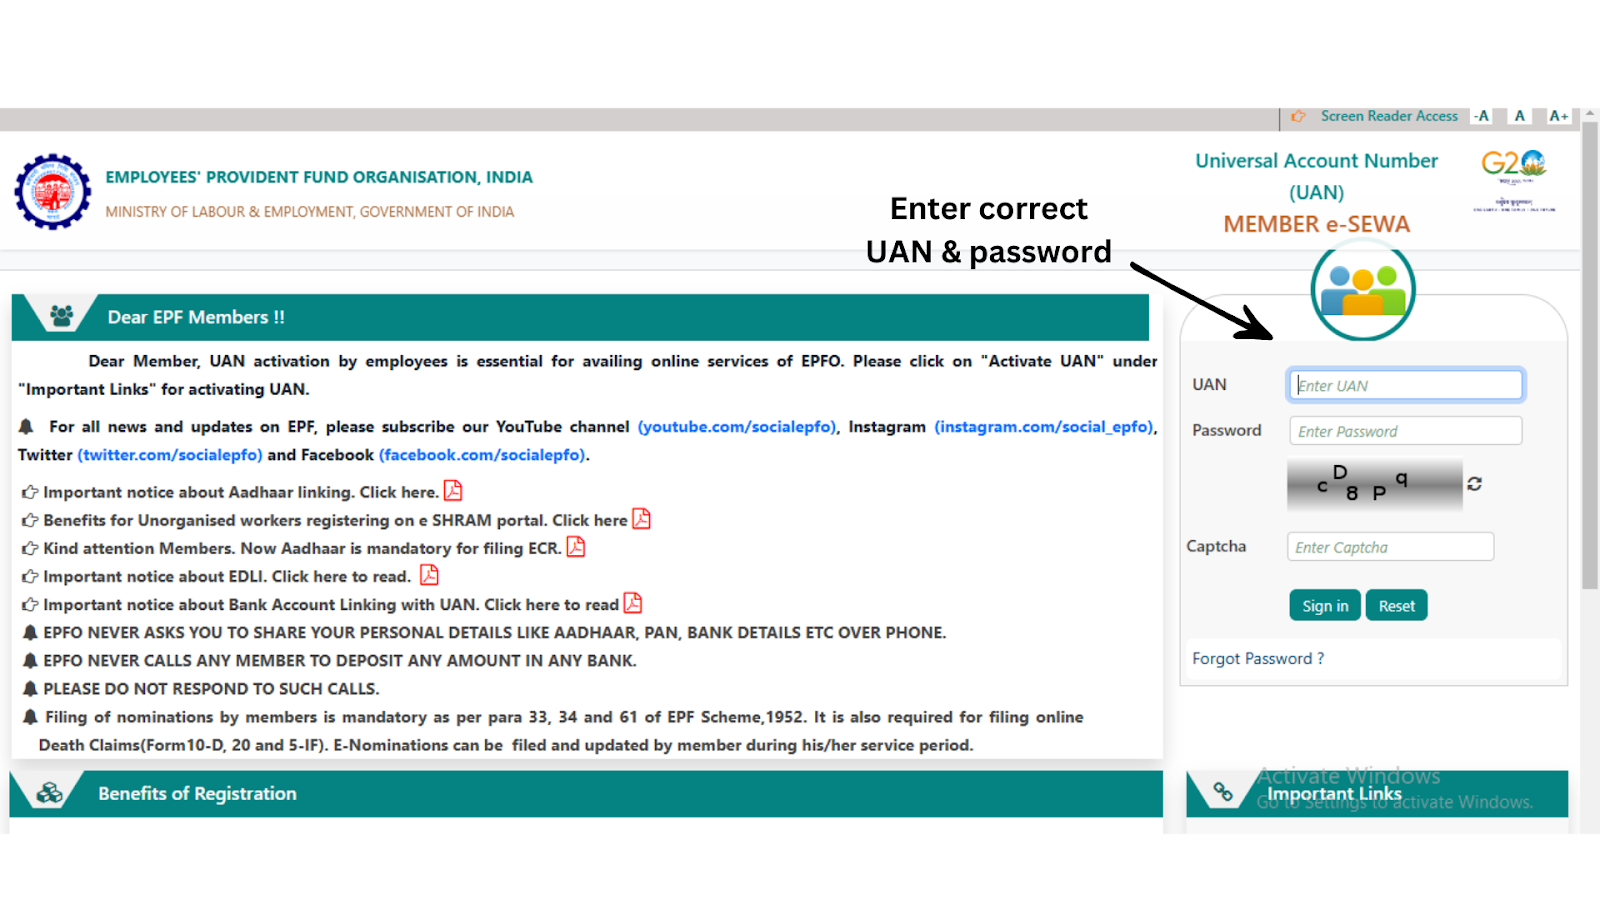
Step 1: Login to the UAN Portal
Go to https://unifiedportal-mem.epfindia.gov.in/
Login using your UAN and password.
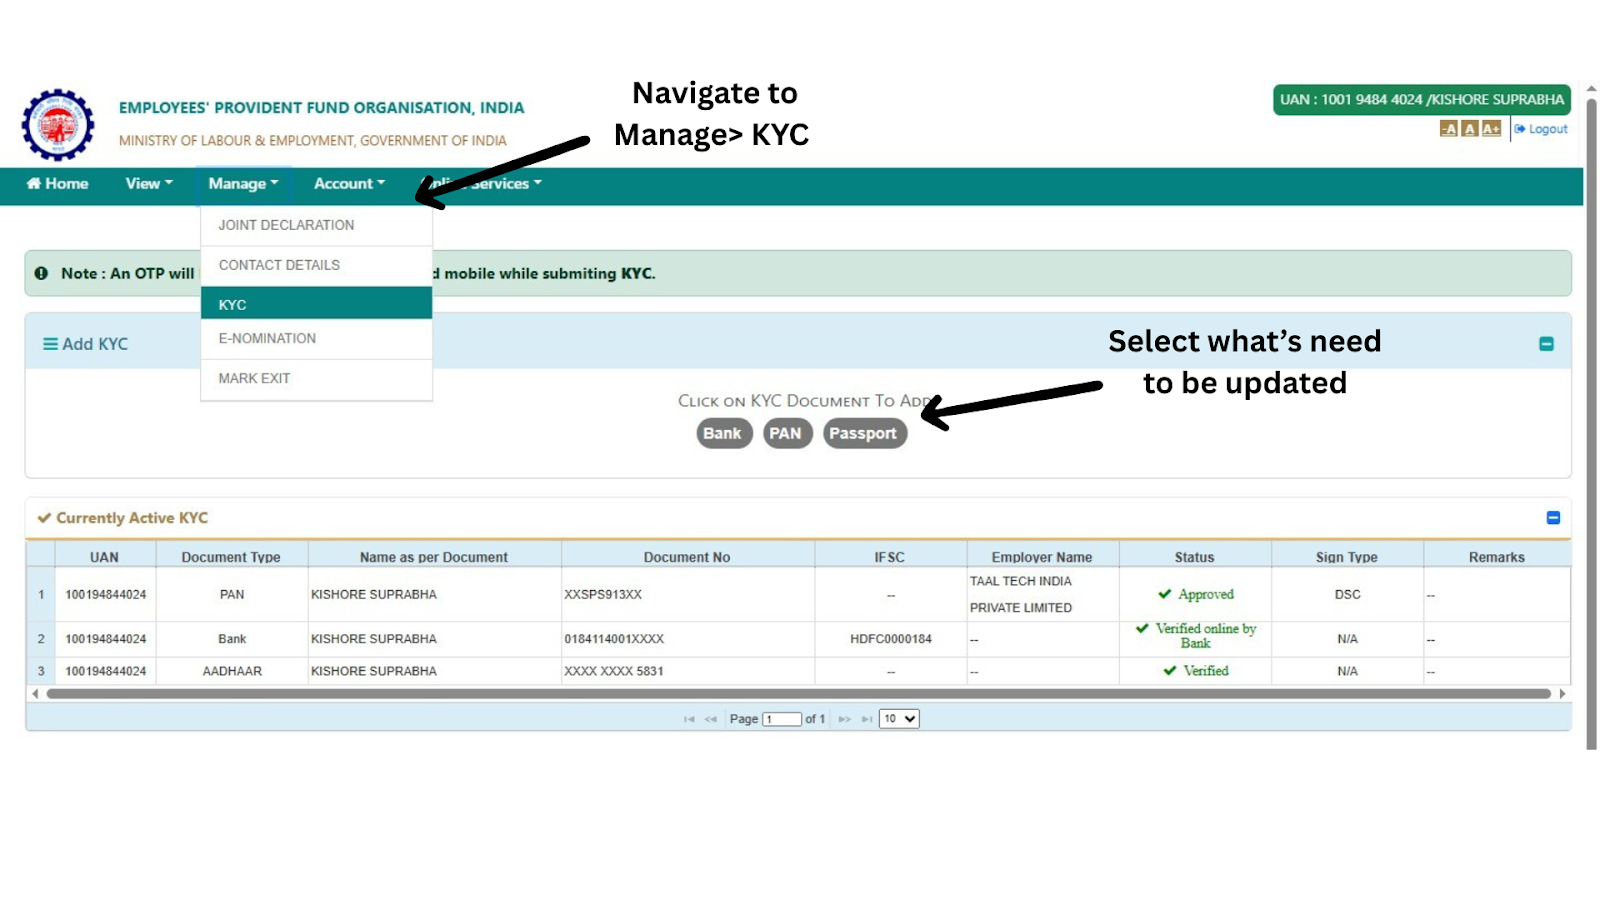
Step 2: Navigate to ‘Manage’ > ‘KYC’
Click on the ‘KYC’ option under the 'Manage' tab.
Step 3: Enter Your Details
Fill in the details like Aadhaar number, PAN, bank account details, etc. Upload the scanned copies.
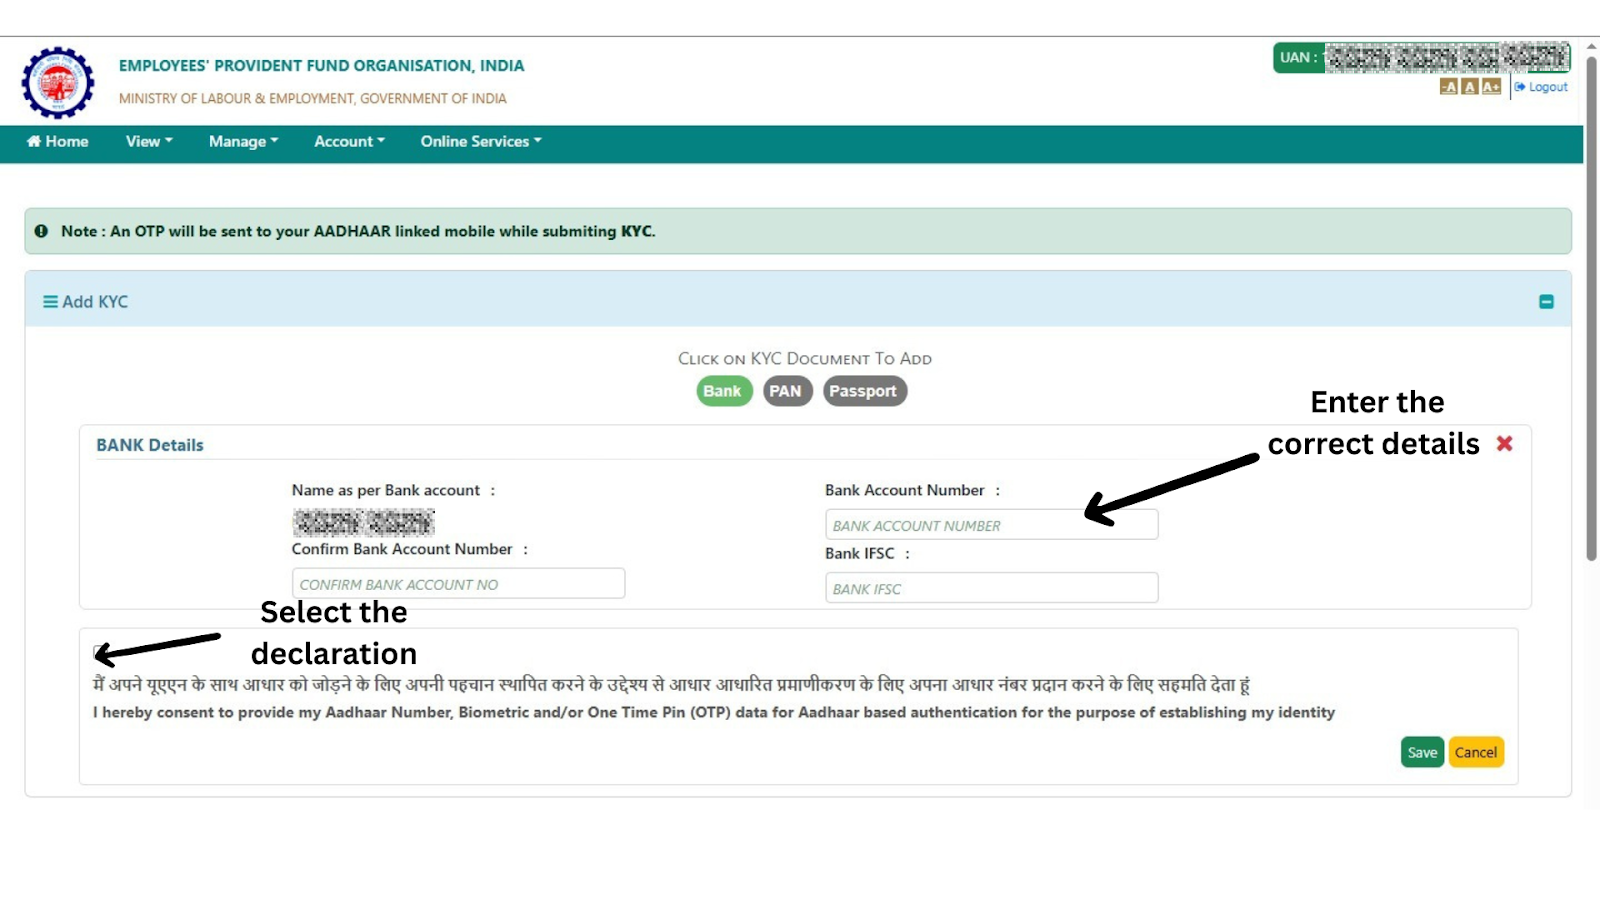
Step 4: Save and Submit
Click on “Save.” The status will show as “Pending for employer approval.”
Step 5: Wait for Employer Approval
Your employer needs to digitally approve the KYC update. Only then it reflects as "Approved by Employer and Verified by UIDAI."
Employer/Bank Approval (Simplified in 2025)
Here’s what changed this year:

❗ If the details match your Aadhaar name and DOB, verification is instant.
How to Check KYC Status
- Go to UAN portal > ‘Manage’ > ‘KYC’
- Approved KYC will be shown under “Digitally Approved KYC”
- You can also check KYC status in UMANG App > EPFO > View Profile
Final Words
In 2025, EPFO has taken major steps to simplify KYC updates and reduce employer dependence. If your KYC is still pending, now is the time to fix it — so your PF money doesn’t get stuck when you need it most.
💡 Pro Tip: Once your KYC is verified, you can also auto-transfer PF when you change jobs.